
(Some of my hintervision thoughts are posted elsewhere. Here is an article from our Cloud Engagement Hub publication on Medium)
Intro
With the constant enhancements in cloud capabilities, there really is no excuse for an application to fail because it ran out of resources. In an earlier blog I detailed how to set up autoscaling policies for an application, and today I will detail how to automatically scale entire clusters.
For this procedure, I will be using a Red Hat OpenShift cluster on IBM Cloud running OCP 4.3, and I’ll be using our trusty “Stock Trader” microservices-built application.
Create Cluster
I first went to IBM Cloud to create a Kubernetes cluster, which I called ‘hintercluster’:
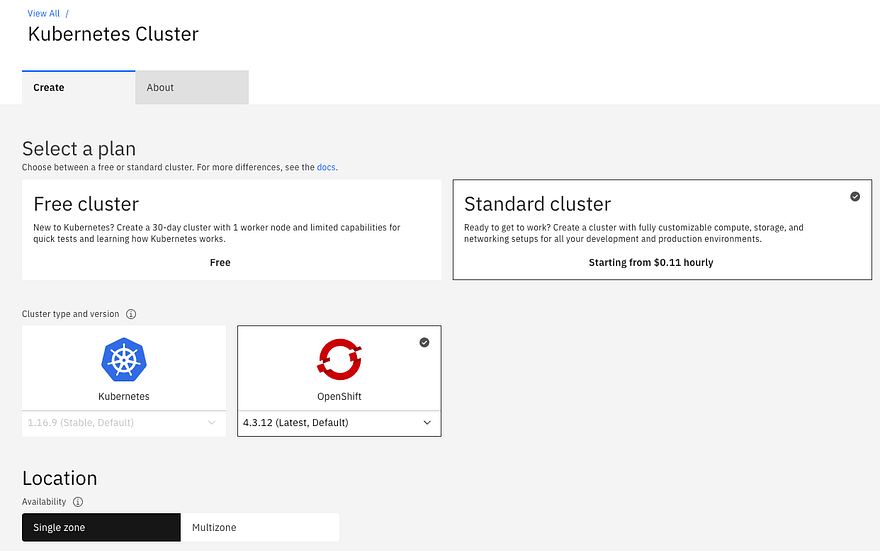
- Go to https://cloud.ibm.com/kubernetes/catalog/create
- Select the type of cluster. I chose OpenShift, but you can also select IBM’s community Kubernetes cluster. Here are the differences: https://cloud.ibm.com/docs/containers?topic=containers-cs_ov#cluster_types
- Select single zone or multi-zone
- Select type of worker node. I chose 8 vCPU with 32GB RAM
- Select number of worker nodes (I chose 3)
That’s it. The IBM service then provisions the worker nodes, prepares them, and in 10 minutes or so I had my cluster ready.
Add Cluster Autoscaler
Once the cluster was created and ready to go, I needed to install the cluster autoscaler (I used this link as my guide). The plug-in is installed through a helm chart so the following steps get helm configured and then the chart installed.
First, I logged into my IBM Cloud account using the ibmcloud command line. Then, I used the oc command line to connect from my laptop to my OpenShift cluster so that the helm commands ran against ‘hintercluster’.
Second, I had to add Helm 3.2 onto my laptop. Since I last used helm in 2.x time, a lot has changed, including the requirement to run the helm tiller on the cluster. This is a great enhancement since I was able to add the helm CLI and start helming without any cluster setup. I did have to alter the written instructions by using brew upgrade helm rather than brew install helm since I had and older release of helm already installed.
brew upgrade helm
Third, I added the chart repo that contained the cluster autoscaler:
helm repo add iks-charts https://icr.io/helm/iks-charts
helm repo update
When I installed the cluster autoscaler I also needed to define the behavior of it. Notice the — set variable. You will want to use this define your worker node maximum (in this case it is set to 10), and minimum (in this case it is set to 2), and don’t forget to set enabled=true.
helm install ibm-iks-cluster-autoscaler iks-charts/ibm-iks-cluster-autoscaler --namespace kube-system --set workerpools[0].default.max=10,workerpools[0].default.min=2,workerpools[0].default.enabled=trueFinally, I verified the cluster autoscaler is running by running this command:
oc get pods --namespace=kube-system | grep ibm-iks-cluster-autoscalerThat command returned the following:
ibm-iks-cluster-autoscaler-6cdfbb8b8-ghc42 1/1 Running 0Then I ran this command:
oc get service --namespace=kube-system | grep ibm-iks-cluster-autoscalerThat command returned the following:
ibm-iks-cluster-autoscaler ClusterIP 172.21.152.19 <none> 8085/TCP
Add Application to Scale
To show how the cluster automatically scales in response to applications requesting more resources, I needed to add an application. None better (for us) than using Stock Trader. You can certainly use your own, but this one already had HPAs (Horizontal Pod Autoscalers) defined and it has multiple microservices to scale up and down.
To get Stock Trader installed, I used the new Stock Trader Operator, using this blog entry as a guide.
It was fairly straight forward. I just ran the commands it suggested, and in the UI added the information to our running services for DB2, MQ, Redis, and ODM.
Using the Cluster Autoscaler
Now that we have our application running on our autoscale equipped cluster, I needed to start triggering the cluster autoscaler. The cluster autoscaler scales clusters based on the “resource requests”, or CPU allocation. That means that it will autoscale based on resources requested, not based on actual CPU utilization. In practice the cluster autoscaler will start scaling when a pod cannot be scheduled by the Kubernetes Scheduler due to resource requests not able to be met.
Therefore, to trigger the cluster to start auto-scaling, I added more running pods in the Stock Trader application, and for good measure, also increased the resource requests. To increase resource requests, I clicked on the deployment, then selected the “YAML” tab, and scrolled to the “resources” section:
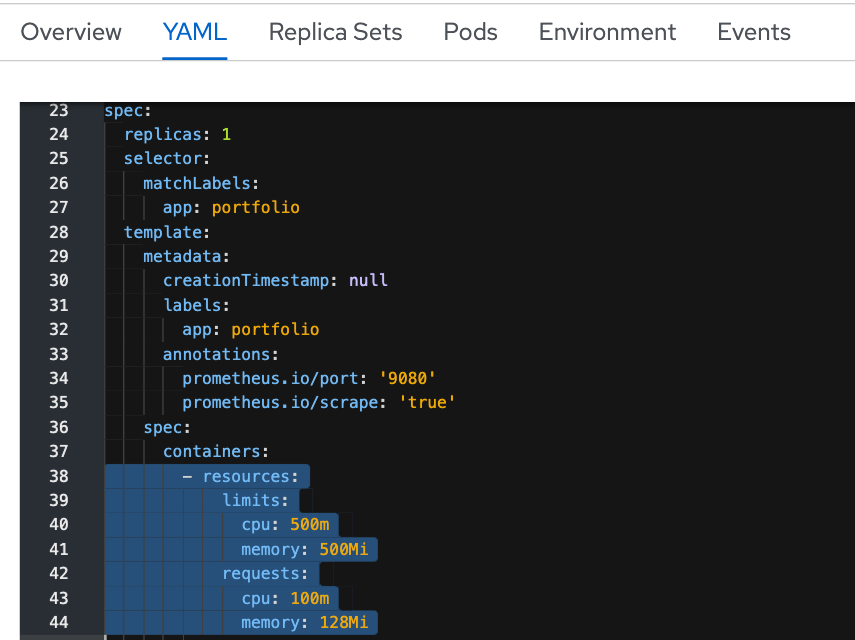
Since I wanted to ensure the Cluster Autoscaler would trigger, I increased CPU Requests to 1200m. To be clear: an application can be deployed without any resource requests/limits specified, but I do not recommend it. For many reasons (app autoscaling, cluster autoscaling, quota, etc.) you really need to have resource requests/limits specified (along with liveness and readiness probes but you can read about that in our cloud native blogs)
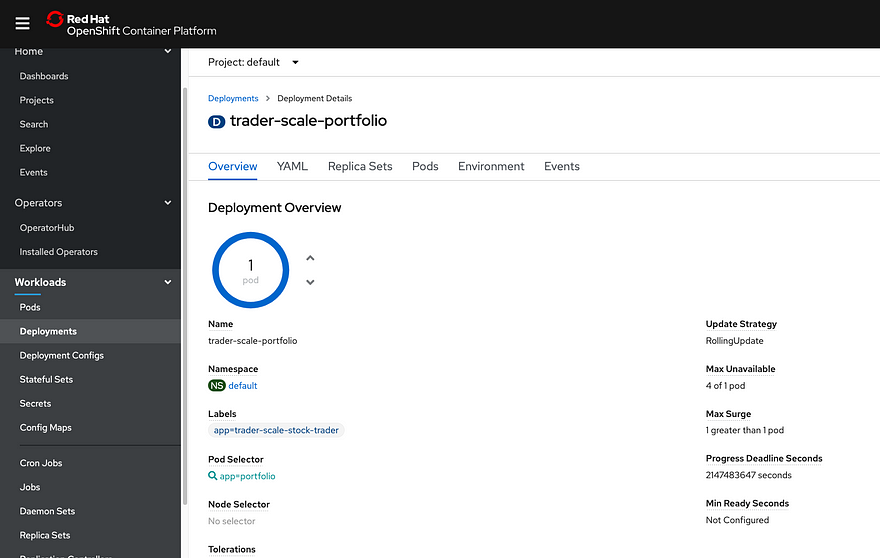
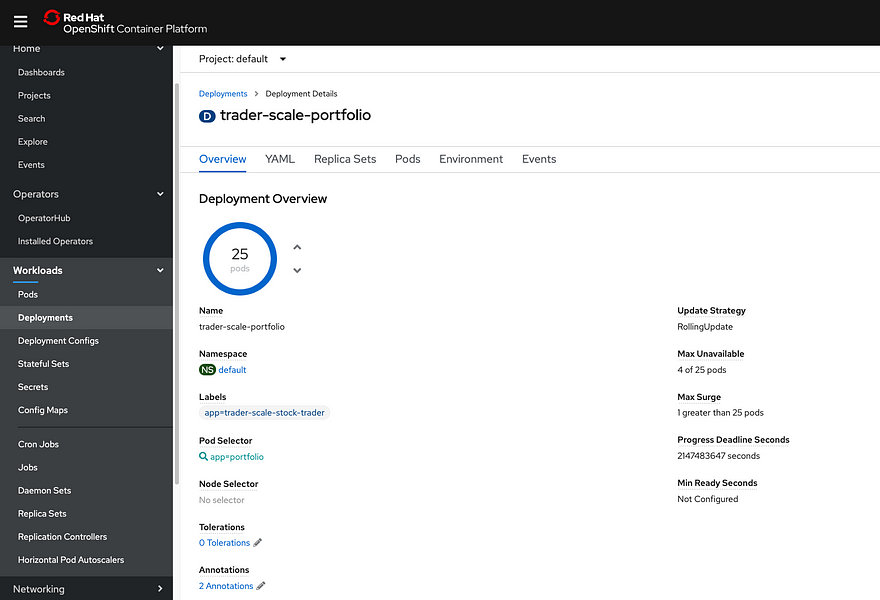
To increase the pod count, I opened the OpenShift UI, navigated to the “trader-scale-portfolio” deployment, and increased the number of pods. It started with one pod, and I scaled it to 25.
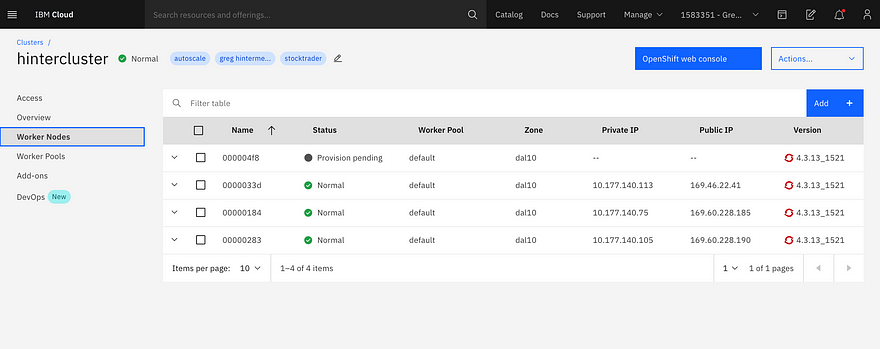
After a few minutes, the deployments stopped, so I looked at the UI and it was paused on 15 deployed pods:
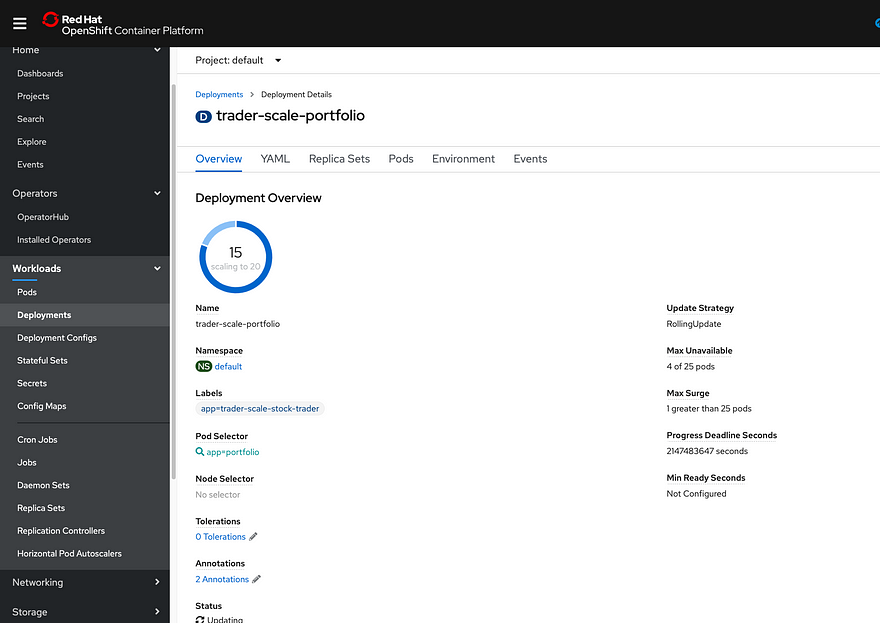
The cluster autoscaler scans the Kubernetes scheduler every 10 seconds, so it will initiate the request fairly quickly to scale-up. Once I noticed the provisioning paused, I then opened the IBM Cloud Clusters UI and saw that the number of worker nodes was being increased:
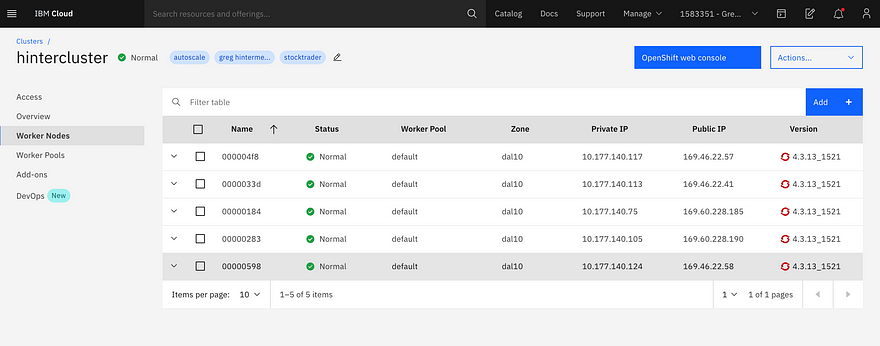
After a few minutes waiting to provision the VM and prepare it as a worker node, Kubernetes continued to deploy pods. I looked at the deployment UI and soon saw the pod count at 25:
To verify what the cluster autoscaler accomplished, I opened the worker node view and saw the cluster had quickly increased to 5 worker nodes:
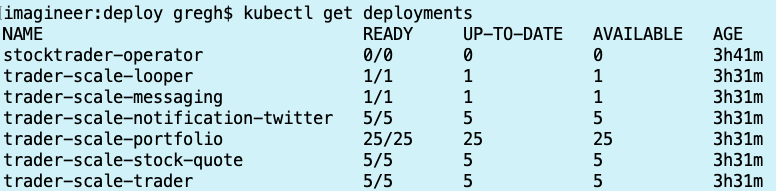
I also ran a check on the command line to ensure all pods were running, I ran
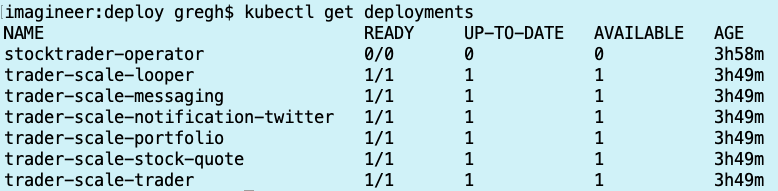
kubectl get deployments
and sure enough, all the deployment scaling increases have completed:
I let the application run for a while, then decided to “scale down” back to 1 pod each microservice. The cluster autoscaler scales down based on there being less than 50% of total CPU being requested, but it waits 10 minutes before removing a compute node, so it takes longer to get to the target “scaled down” state than it does to scale up. That said, the scale down of the pods took merely seconds since it’s just deleting pods. Eventually, everything settled down and I ran the command again to view deployments:
Interesting Findings
One of the interesting findings in this was that the Stock Trader operator quickly proved its worth. In this declarative world of Kubernetes, the operator controls most everything about the Stock Trader application, and as I tried to “mess with the app” in order to test the autoscaling, it kept “fixing” things. For example, I tried to edit the HPA, but the operator wouldn’t let me. Additionally, I tried to manually scale up the deployment (increase the pod count) but it would always kill the newly created pod to match the deployment yaml file. In the end I “scaled down the stock trader operator deployment to zero so that I could temporarily regain control.
What this shows me is that operators are powerful, and that in production they provide an added level of controls so that human error of entering the wrong number can be prevented; but it also shows me that the operator should be installed in a namespace that has stricter access controls than the namespace it’s deployed into. That way only trusted experts can alter the operator itself.
Another interesting finding is that while I started with three worker nodes, and the cluster autoscaler increased to five, when it scaled down, the lowest worker node count was four. Initially I thought there was a defect…and there was! But only in my head! Only later I realized that this is due to the cluster autoscaler using different metrics to scale up vs. scale down. Remember: It uses “Resource Requests” to scale up…if the Kubernetes scheduler can’t provision a pod, it triggers a scale-up. This means the worker node could be at 90% capacity of requested CPU and could still schedule a deployment depending on how big the worker node is and how much resource is requested. However, it will only scale-down if a worker node is running with less than 50% of its total resources available for 10 minutes. This is a fairly big difference. The good news is that these values can be customized. All the details (with sample .yaml) can be found here.
A third interesting finding was that when I edited the YAML to increase resource requests, OpenShift nicely updated the pods based on the deployment strategy, in this case “RollingUpdate”, and used the “MaxUnavailable” value in the deployment. If you look closely at the images above you will see I eventually increased the maximum unavailable to 4 so that the 25 pods would update faster. However, in production, faster is not always better, so think wisely on your update strategy (learn more here)
The last interesting finding is that for an MZR-enabled cluster, which spreads work across three availability zones, the cluster autoscaler will work to scale-up all worker pools of the same type. It may not scale each worker pool for the multi-zone cluster to the same exact number of worker nodes, but will use the same rules to ensure there is capacity to deploy. Alternately, you can choose to opt-out of auto-balancing the matching worker pools resulting in each zone being auto-scaled at its own rate and pace.
For additional deep-dive findings, take a look at this detailed FAQ.
Summary
Scaling clusters, as well as applications, is essential for running mission-critical workloads. The cluster autoscaler works great on both IBM Kubernetes Service and Red Hat OpenShift on IBM Cloud. If you have questions and comments, I’d love to hear of your experiences in the comments.
Chat next time!
ajd7z2
c6z94v
7evt9k